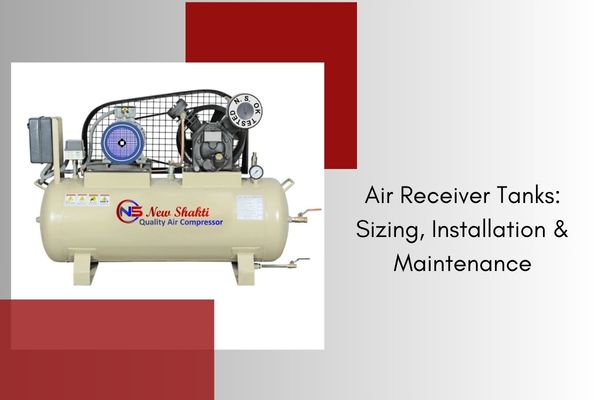
Air Receiver Tanks: Sizing, Installation & Maintenance
For any industrial air compressor system, air receiver tanks play a pivotal role in stabilizing pressure, reducing cycling, and ensuring continuous operation. As a trusted manufacturer, supplier, and exporter of air compressors and compressor spare parts, we understand how critical these tanks are for efficiency and longevity.
Whether you are setting up a new facility or upgrading your existing system, knowing how to size, install, and maintain air receiver tanks is key to maximizing performance.

1. Why You Need an Air Receiver Tank
Air receiver tanks act as a buffer reservoir between the compressor and your tools or production lines. Their benefits include:
- Pressure Stability: Smooths out pulsations from the compressor, providing steady outlet pressure for tools and processes.
- Reduced Cycling: Allows the compressor to run longer between starts, extending motor and component life.
- Emergency Reserve: Stores compressed air for brief outages or peak demands.
- Moisture Separation: Condensed water droplets fall out in the tank, improving downstream air quality.
By pairing your tanks with high-quality compressor spare parts, you ensure seamless operation and long-term reliability.
2. How to Size Your Air Receiver Tank
Correct sizing of air receiver tanks depends on compressor capacity, duty cycle, and the type of application. Our guideline:
- Determine Compressor CFM: (e.g., 50 CFM at rated pressure).
- Decide Desired Receiver Volume: Industry guideline is 3–5 gallons of storage per 1 CFM of compressor output.
- Formula:
Tank Volume (gal) = Compressor CFM × 4
- For a 50 CFM compressor:
50 CFM × 4 gal/CFM = 200 gal receiver
- Formula:
- Adjust for Duty Cycle & Peak Demand:
- If you need more surge capacity or run short‑burst tools, increase volume by 20–30%.
- Conversely, for very intermittent use, you can size closer to 3 gal/CFM.
Example: A packaging line requiring 80 CFM at 100 PSI might use a 300–350 gal receiver to smooth demand spikes.
3. Installation Best Practices
- Vertical vs. Horizontal: Vertical tanks save floor space; horizontal tanks are easier to drain and inspect.
- Proximity to Compressor: Install the receiver as close to the compressor discharge as possible to capture moisture early.
- Foundation: Place on a level, vibration‑dampened concrete pad, using isolation mounts to reduce noise.
- Inlet & Outlet Valves: Use full‑port ball valves for service and isolation.
- Safety Relief Valve: Install per ASME code—set at 110–125% of maximum working pressure.
- Drain Valve: Fit an automatic float drain at the lowest point to expel condensate continuously.
- Pressure Gauges: One at the compressor and one at the tank outlet to monitor differential.
- Insulation: In cold environments, wrap the tank to prevent freezing of condensate in drains.
- Venting: Ensure adequate ventilation around the tank to disperse heat and avoid condensation buildup.
4. Routine Maintenance Checklist
| Task | Frequency | Details |
|---|---|---|
| Drain Condensate | Daily or auto | Verify float drain operation; manual drain if needed. |
| Inspect Safety Relief Valve | Monthly | Test valve pop‑off; replace if corroded or stuck. |
| Check Pressure Gauges & Valves | Monthly | Ensure accurate readings; tighten any leaks. |
| Coat External Surfaces | Annually | Inspect for rust; touch‑up paint to prevent corrosion. |
| Internal Inspection (ASME vessels) | 3–5 years* | Follow code for internal inspection & thickness test. |
| Anchor & Foundation Check | Annually | Verify bolts and mounts remain secure. |
*ASME‑coded tanks require periodic inservice inspection per regional regulations.
5. Troubleshooting Common Tank Issues
Excessive Moisture in Downstream Air:
→ Check/clean drain valve; ensure piping slopes toward tank drain.Pressure Drop Under Load:
→ Tank too small or compressor underpowered; consider upsizing.Corrosion & Rust:
→ Inspect paint coating; schedule internal cleaning and re‐coating.Leaking Weld Seams:
→ Take tank out of service; consult certified welder for repair or recertification.
6. Advanced Tips for Optimal Performance
- Pre‑Filter Installation: Install a coalescing filter upstream of the tank to reduce oil carryover and extend tank life.
- Secondary Air Receivers: For large installations, use multiple smaller tanks in parallel for maintenance flexibility.
- Tank Heater: In cold climates, a small tank heater prevents freeze‑ups in the drain.
- Inline Moisture Separators: Place after the receiver to catch any remaining condensate before pneumatic devices.
By integrating air receiver tanks, compressor spare parts, and high-quality filters, your system can achieve maximum reliability and efficiency.
Interested in Our
Air Compressor & Spare Parts
Explore our extensive range of Industrial Compressor, including service and a robust support network, along with genuine Compressor Spare Parts designed to fulfill your exact requirements.
Get Best QuoteConclusion
Air receiver tanks are the backbone of any compressed air system. By sizing correctly, installing professionally, and maintaining regularly with genuine compressor spare parts, you ensure:
- Consistent pressure for all operations
- Reduced wear and longer equipment life
- Optimal production efficiency and uptime
As an established manufacturer, supplier, and exporter of air compressors and spare parts, we provide complete solutions to meet all industrial compressed air requirements.
Invest in quality tanks and parts today for a more reliable, efficient, and long-lasting compressed air system.
